How to wood panel a wall
![]()
Why choose wooden wall panelling?
Measuring for traditional box panelling
Measuring for board and batten panelling
The materials and tools you’ll need
Step by step: How to wood panel a wall
With the rise of modern yet characterful home aesthetics, wood panelling has become a popular trend for both homes and commercial spaces. With the ability to be used indoor or outdoors, wood panelling is a great way to add a bespoke look to any wall.
Most joiners and carpenters charge anywhere from £150 to £250 per day — this is usually enough time for an expert to wood panel a standard wall with a basic design, but it could take up to two or three days (and a bigger budget) for larger walls with complex slats and designs.
This is why property owners are starting to take matters into their own hands, using a DIY approach and reliable power tools to add wood panelling. Learn how you can wood panel a wall yourself in our easy to follow guide below!
Why choose wooden wall panelling?
Wood panelling is no new trend. This home decor option has actually been around since the 13th century and survived through the Tudor, Stuart, Georgian, and Victorian periods — all the way to the modern day. So, why is it still so popular?
For interiors
- Adds texture and character to plain walls for a new look and feel
- Creates a wooden feature wall as a visual statement
- Adapts to any style, from modern and minimalist to rustic
- Provides a variety of wood panelling ideas for a unique appearance
- Hides any wall imperfections
- Improves the acoustics of a room
For exteriors
- Low maintenance when sealed and painted
- Weather resistant (when treated)
- Highly durable
- Blends in with any outdoor area
For commercial properties
- Creates a high end finish
- Works well in office receptions, cafe checkouts, and retail customer service desks
- Ideal for high traffic areas due to its durability
For residential properties
- Can potentially increase home value
- Easily customisable using different paints, stains, and finishes
- Affordable
- A simple DIY project that delivers many aesthetic and functional benefits
How to measure wall panelling
If you’d like to learn how to wood panel a wall, the first step is to work out wall panelling measurements. Your measurements will help you plan the panelling layout, and also keep things looking even and clean throughout.
Tools you’ll need:
- Tape measure
- Spirit level
- Pencil and paper
- Your chosen battens
- Calculator
What to do:
Step 1: Using your tape measure, note down the height and width of the wall you’re panelling. If your wall has a skirting board, measure from the top of the skirting.
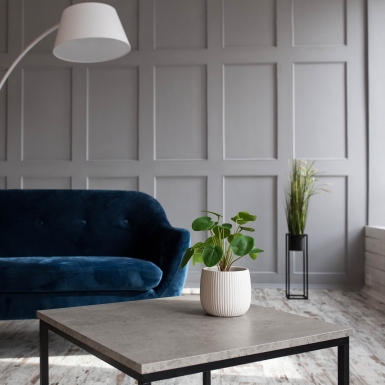
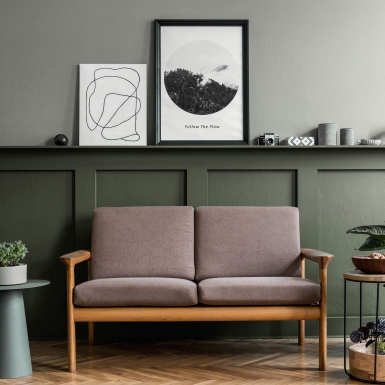
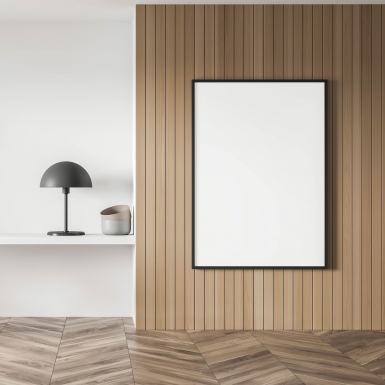
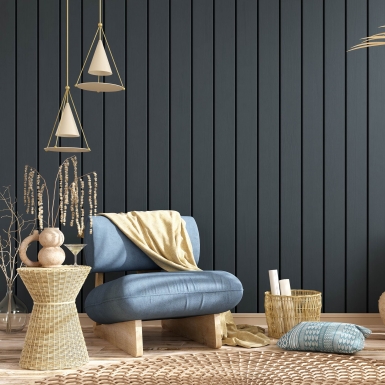
Step 2: Choose your wood panel layout or design and roughly sketch it out onto a piece of paper. Some popular easy wall panelling options include traditional box panelling, half-height panelling, vertical batten panelling, and board and batten panelling.
Step 3: Calculate the panel and gap sizes based on your chosen panelling layout.
![]()
![]()
![]()
![]()
Measuring for traditional box panelling:
- Decide how many vertical and horizontal battens you want
- Measure and note down the width of your battens
- Subtract the total width of the battens from the width of the wall (batten width x number of gaps = total batten width to subtract)
- Divide the remaining space by the number of panels for an even panel size
- Repeat the same process for the height for the vertical panels
Example
- Wall width = 300cm
- 4 x vertical battens with 5 gaps x 6cm thickness = 30cm
- 300cm - 30cm = 270cm
- 270cm ÷ 5 panels = 54cm wide panels
Measuring for half-height panelling:
- Measure the width of the wall
- Choose the height you want your panels to reach (up to the halfway point)
- Note down the width of each batten and subtract their total width from the wall width
- Divide the remaining space
- Account for a horizontal batten at the top for an even finish
Measuring for vertical batten panelling
- Measure the height and width of the wall
- Note down the width of each batten and each gap between them
- Add the batten width and gap width together to get the unit width
- Divide the wall width by the unit width to work out how many battens you need
Example
- Wall width = 240cm
- Batten (4cm) + gap (2cm) = 6cm (unit width)
- 240cm ÷ 6cm = 40 battens needed
Measuring for board and batten panelling
- Measure the width and height of the wall
- Determine the board width and batten width
- Add these together to get the unit width
- Divide the wall width by the unit width to see how many boards you need
Example
- Wall width = 300cm
- Board (30cm) + batten (5cm) = 35cm (unit width)
- 300cm ÷ 35cm = 8.5 (and adjust)
Step 4: Double check your calculations to avoid any delays or mishaps once you start.
![]()
The materials and tools you’ll need to wood panel a wall
For everything you need to wood panel a wall, take a look at the list below:
Materials:
- Your chosen battens
- Wood adhesive
- Wood filler
- Caulk
- Primer
- Paint
Tools:
- Spirit level
- Tape measure
- Pencil
- Mitre saw, hand saw, or circular saw (not sure which saw to go for? Take a look at our buying guides for the best mitre saws and best cordless circular saws)
- Sandpaper or electric sander
- Caulking gun
- Hammer and nails or a nail gun (take a look at our buying guide for the best cordless nail guns)
- Paint brushes or rollers
Step by step: How to wood panel a wall
![]()
![]()
![]()
![]()
Once the measurements are determined and you’ve gathered your tools and equipment, it’s time to move on to the main event: installing your wood panelling. Follow the simple steps below to wood panel a wall.
Step 1: Preparing the wall
Your wall is the base for the whole wood panelling project, so it’s important to take the time and effort to prepare it.
- Use a filler to patch up any imperfections — this will ensure the surface is as even as possible.
- Lightly sand the wall using sandpaper or an electric sander to help the adhesive bond to the wall.
- Make sure the wall is clean, dry, and smooth before you start. Get rid of any lingering dust or debris using a dry cloth.
Step 2: Marking the layout
Use your tape measure and a pencil to mark out your pre-planned batten layout onto the wall — guesswork won’t deliver an even finish or a professional look! You can use your spirit level to help you draw straight horizontal or vertical lines.
Don’t forget to visually check the spacing and re-check with the tape measure to ensure it is consistent. Don’t rush this stage — it will save you from errors later on.
Step 3: Cutting your panels to size
Grab your battens, your chosen saw (whether it be a mitre saw, hand saw, or circular saw), and your sandpaper or electric sander.
Check your measurements before cutting, and then sand any rough edges for a polished look.
Step 4: Fixing the panels in place
When your battens are measured and cut ready for positioning, it’s time to fix them to the wall.
- Apply a thick line of wood adhesive to the back of each batten.
- Press the batten onto the wall using the pencil marked guide for positioning.
- Use the spirit level to check the level of each batten before the adhesive sets.
- Use a hammer and nails or a nail gun on heavier battens for extra durability.
Step 5: Filling and smoothing
With the hardest bit over, it’s time to fill and smooth for a truly professional finish.
- Fill any gaps between the battens with a wood filler.
- Wait for the filler to dry, then sand it down to create an even surface.
- Add caulk to the edges where the battens meet the wall and smooth using your finger or a caulking tool.
If you’re planning on painting over your battens, make sure to use a paintable caulk.
Step 6: Priming and painting
This step is where you can customise your wood panelling so it fits in with your vision:
- Apply a coat of primer to your battens.
- Apply your chosen paint using paint brushes or rollers, and wait for the first layer to dry.
- Apply another coat to ensure adequate coverage.
And you’re done! You’ve successfully learnt how to wood panel a wall.
How to make panelling around windows easier
Wood panelling can be applied to any wall, so it’s important to know what to do if you’d like to wood panel a wall with existing windows. Working around windows can seem a bit intimidating and complex at first, but we have a few tips to help you along the way:
- Use a pencil and paper to sketch out where you want your panels to go around the window frame. Your battens should meet around the window edge as a kind of frame.
- Be prepared to do some adjusting. You’ll probably find that a batten or two lands awkwardly across the window, so you may have to adjust your panel spacing to keep your layout symmetrical.
- Take extra time when conducting your measurements. Having windows means you’ll need more precise cuts in some areas, so we recommend measuring each section separately to account for this.
- Most windows have a ledge, so you’ll need to factor in the windowsill height to your batten lengths if you’re using a vertical design. We suggest cutting the battens shorter underneath the windowsill and then using full height on either side.
How to make a shelf on top of panelling
![]()
If you want to take your DIY wood panelling a step further, you can always include wall panelling with a shelf on top. It will look great, but also create a nice area with extra space for displaying decorations, plants, and photos.
For a custom-made wall panelling look, here’s what to do:
-
Choose your shelf material
For a cohesive look, choose a shelf material that is similar to your wood panelling. MDF wood panels are a popular choice as they are budget friendly and easy to paint over. Other options are pine for a rustic look or oak for a more classic appearance.
-
Measure and cut to create your shelf
For a clean look, we recommend measuring the shelf to run the full width of the wall, but you can also create a mini shelf if you prefer, or if you’d like to install a few smaller walls.
You should then decide on your shelf’s overhang. Most shelves extend one to two centimetres over the battens, but the final measurement is down to you, depending on what you’d like to display on the shelf and how you’d like it to look.
Once you’ve decided, use a mitre or circular saw to cut your shelf to size — these cordless power tools will give you a nice clean edge.
Finally, sand any rough cuts gently with sandpaper or a sander tool to prepare the surface for staining or painting.
-
Fix, fill, and finish the shelf to secure
Once you’ve assessed the fit, you’ll need to attach the shelf to the wall.
- Mark the position of the shelf and pre-drill pilot holes into the panelling below.
- Fix your shelf to the panelling. Your shelf will need to be directly secured to the panelling below using screws or nails (made easier with a nail gun), and maybe even shelf brackets to ensure the shelf can hold weight and that the panels aren’t overloaded.
- Apply a wood filler to fill any gaps or over the nail heads, and run some caulk beneath the shelf where it meets the wall for a seamless look.
- Sand with sandpaper or an electric sander before painting or staining to match the colour of your panelling. You could even go for a different colour for the shelf to stand out more.
Find the best power tools for any DIY project with ToolStore UK
Whether you’re adding wood panelling to a wall, building a pergola, or conducting a renovation, you can find all the power tools you need from us at ToolStore UK. We even stock hand tools, accessories, and tool storage solutions.
Our tools and equipment come from the industry’s best tool brands, from BOSCH and DeWalt to Makita and Milwaukee.
Enjoy free UK delivery on all orders over £55 and invest in the best power tools for the job today with ToolStore UK. For any questions or advice, don’t hesitate to give us a call at 03330 043 777 or fill in our contact form!- 24th April 2025


