How To Plaster A Wall - Step-By-Step Guide
Plastering walls is the kind of home decorating task many people leave to a trade professional. However, if you have the time and patience to prepare fully and work through the process, this is certainly a job that could be carried out by a DIY enthusiast. Replastering a wall can take time but, with the right tools and a bit of planning it is a project which can be tackled without bringing in an expert.
What Tools Do You Need to Plaster a Wall Yourself?
You’ll need a few hand tools to get the best possible finish for your wall:
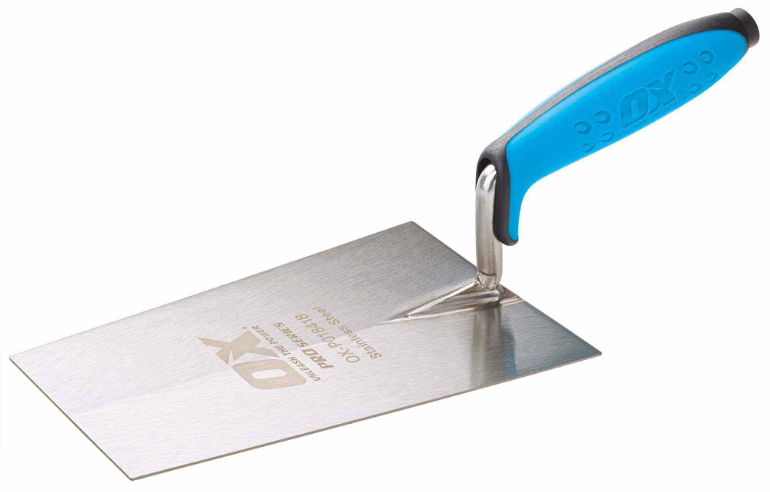
- Plasterer’s trowels: There are a couple of different types you’ll need for great results. There’s the plastering trowel itself, which you’ll use to apply the plaster. You’ll also need a hawk: this is the board which holds the plaster. It’s a good idea to invest in a bucket trowel for transferring the mixed plaster onto the hawk. Finally, a finishing trowel will help you smooth out any imperfections.
- Dust sheets: You’ll need to lay dust sheets down to protect your floor. If you’re removing old plaster, it’s sensible to have a set for this stage and a different set for applying fresh plaster as this prevents the new plaster from becoming contaminated by dust.
- A tub or bucket for mixing plaster in. Our range from Red Gorilla is ideal and can also be used for other storage needs.
- At least one paintbrush. You’ll use this to keep your edges clean and for applying water to your plaster.
- A decorating abrasive for removing debris from your wall before you start plastering.
- PVA glue and plaster for mixing. The glue is applied to the wall to help the mixed plaster adhere to the wall.
Plus, depending on the size of the job and the condition of the walls you may also need:
- Filler: If you’re dealing with very uneven walls or need to patch a hole prior to plastering, start by applying filler to your problem areas. Our range includes ready-mixed and powder-based variations.
- A paddle mixer. Mixing plaster by hand is fine, but if you need to mix a large quantity in a short time, a paddle mixer could save a serious amount of time and effort.
- A cordless sander. Again, if you’re tackling a very large replastering project, using a cordless sander to remove dirt and debris could prove a significant time saving.
READ NEXT: How To Use A Power Drill For The First Time
![Plastering a wall for the first time]()
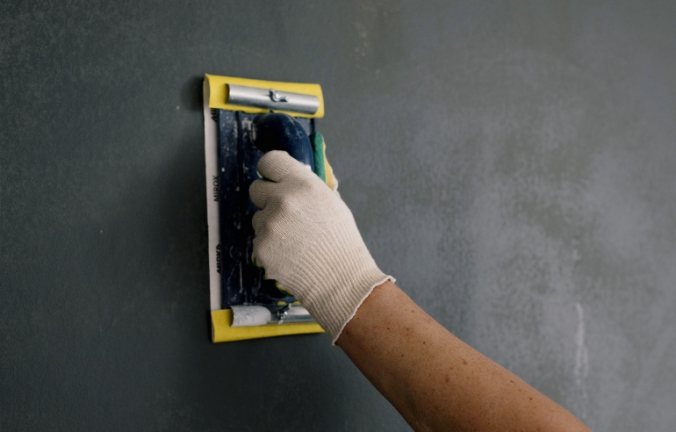
Plastering A Wall on Your Own - Step-By-Step
Prepare the room you’ll be working in.
As a minimum, you should remove all furniture and lay dust sheets on the floor. Then, scrub the wall thoroughly, making sure that any debris, old wallpaper, loose plaster and so on are removed. If you don’t remove debris, the new plaster won’t stick to the wall properly. If you’re working on a large wall, using a Sander might speed things up.
If you’re working with new plasterboard, cover the joints between sheets with plaster tape.
Next, apply PVA glue to the wall. This will need to be diluted before you use it. The most common ratio is one part glue to four parts water, but check the manufacturer’s instructions before you start. Once you’ve diluted the glue, roll, or brush it on to the wall. Don’t wait for it to dry entirely. You can start to apply plaster once the glue becomes slightly sticky to the touch.
Mixing the Plaster
Always follow the manufacturer’s instructions, making sure that you’re working with a clean bucket and clean tap water. Once you have the required amount of water, steadily add the plaster. Adding too much powder at once, or putting water onto the powder, could leave you with an uneven and lumpy mixture.
Use a bucket trowel to work any dry powder gathered around the edge of the bucket into the mixture.
Now, mix your plaster, either by hand or with a paddle mixer. If using a mixer, run it at a slow speed so you don’t ‘overwork’ the mixture. Keep mixing until the mixture is smooth, free of lumps and has a consistency similar to thick custard. Once you’ve mixed the plaster, clean the blades of the mixer so that the plaster doesn’t set on them.
Applying the Plaster
If you’re plastering around a light socket, make sure you switch off the electricity and protect the socket with tape.
Use your bucket trowel to cut some of your mixture away and place it on your hawk. Start with a small amount if you’re not used to using the Hawk.
Now use the plastering trowel to pick up a small amount of plaster from the hawk. Start from the bottom left-hand corner of the wall and work upwards and outwards, using a small amount of plaster each time. To apply the plaster to the wall, spread the plaster firmly using an upwards stroke with the trowel angled slightly away from the wall.
Continue working in this way until you’ve applied plaster evenly to the entire wall. Use small strokes to begin with – you can apply longer sweeping motions to smooth out the plaster.
Allow the first coat of plaster to dry slightly for about 20 minutes. You'll then be able to go over the plaster with a trowel to smooth out any bumps. If necessary, spray some water on sections of the plaster. This will make the plaster respond better to the trowel. Remember to smooth out corners and edges, using a wet brush to even the surface out.
Then, apply a second coat of plaster, repeating the steps outlined above. The second coat needs to be smoother and have an even finish, so the plaster needs to be a little thinner. Refer to the manufacturer’s instructions for further guidance.
Again, leave the plaster to dry slightly. When the surface feels slightly damp to the touch, but the plaster doesn’t move, you’re ready for finishing.
READ NEXT: How To Put Up A Curtain Rail
![How to plaster a wall]()
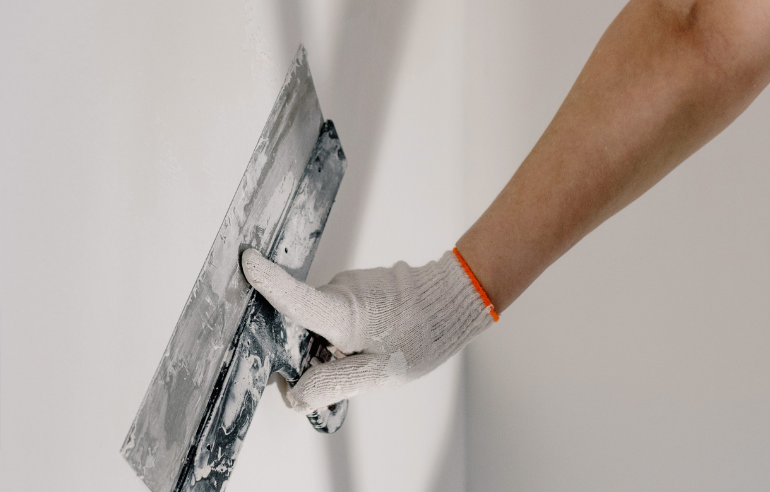
Finishing the Wall
Go over the surface lightly with a clean finishing trowel, lightly spraying the wall with water as you do so. As you did earlier, angle the edge slightly so that the blade smooths over the plaster.
Use a small damp brush to polish off edges and corners.
Now the wall can be allowed to dry completely. Once it has dried, the wall can be painted or wallpapered. Once opened, bags of unused plaster can be resealed and will keep for around two weeks.
ToolStore UK: taking the pain out of plastering!
Whether you’re looking for inspiration for DIY projects or balanced Buyer’s Guides, we love sharing knowledge with our customers. But our blog isn’t the only way our talented team can talk tools with you. Whether you visit us at our store in Wigan, send us a message or call 03330 043777, you can be sure of getting the right information to make an informed decision.
Read More From ToolStore UK
How To Recycle Your Old Power Tools
Read MoreMakita vs Bosch Power Tools
Read More- 15th June 2023
Recently Viewed


Secure online payments via ![]()