How To Fix A Leaking Tap
Leaking taps can be a headache and not just because of the irritating sound dripping water makes. Unchecked, a faulty tap can waste up to 13.6 litres (3 gallons) of water per day which is the equivalent of filling 8 kettles, just to pour them away! However, leaks and drips can usually be taken care of with some hand tools, time and patience.
There are two basic types of tap. Traditional taps work on the ‘compression valve’ principle and have washers at the base of the valve which form a seal. However, some taps – such as monobloc mixer taps – don’t use washers. They are called ceramic valve taps as these taps use two ceramic discs within a cartridge instead of washers. Make sure you know which kind of tap you’re working with and that you have the right replacement parts to hand.
Before you start
The first thing to do is identify where the leak is, as this will determine what kind of repair you need to carry out. If water is leaking from the spout you need to replace the washer or Ceramic Valve Cartridge, depending on the kind of tap you have. If water is leaking from beneath the handle then the valve O-ring will need replacing and if the leak is coming from beneath the spout then the spout O-ring will need replacing. O-rings are the small rubber rings which can be found at the base of the spout or valve. These help to create the seal which prevents drips and leaks.
Next, switch off the water supply to your leaking tap. There might be an isolation valve specific to the problematic tap attached to the pipes underneath it; if there is, use a screwdriver to turn it off. If you can’t find an isolation valve, use the stopcock (which is usually under the kitchen sink) to cut off the water supply. Then, run the taps you’re working on to make sure they’re completely empty. It’s also a good idea to put the plug into the sink once the taps are drained, so you don’t lose any small parts, such as screws.
Remember when you carry out the repair that it’s important not to overtighten any washers or valves when you replace them. This can cause excessive stress on the valve which will lead to further dripping.
Which tools do you need?
You’ll need a few things to help you with this task:
- An adjustable spanner
- Screwdrivers – you’ll need cross-headed and flat-headed screwdrivers
- Lubricant
- Replacement parts – depending on the kind of tap you’re working with you’ll either need new O-rings and washers or a Ceramic Valve Cartridge.
- If you need to replace the spout O-ring, you’ll also need a box spanner.
If you followed our recommendations to put together a beginner’s toolkit, you’ll have most of these items to hand.
READ MORE: How To Unblock A Sink
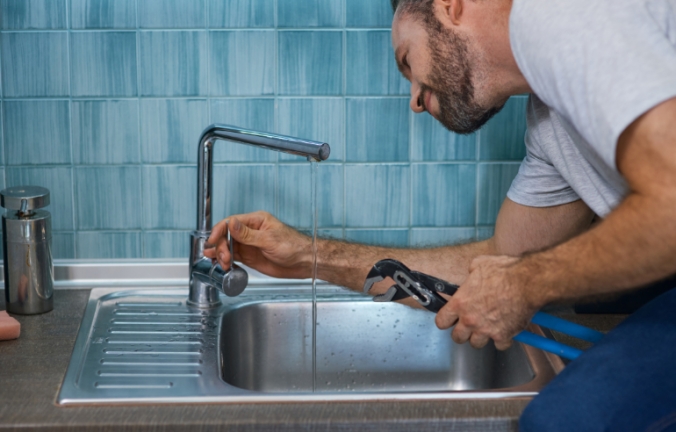
![how to fix a leaking tap]()
How to fix a Compression Valve tap
- If your tap has a handle cap, carefully remove it to access the screw inside the handle. Then unscrew the rest of the valve cover.
- Use an adjustable spanner to loosen the valve, then remove it.
- Use the adjustable spanner to hold the valve steady and use a screwdriver to remove the screw holding the washer in place. Then replace the washer.
- Screw the valve, valve cover, and tap handle back into place. Re-fit the handle cap.
How to fix a Ceramic Disc Valve tap
- Remove the handle cap to expose the top of the valve. Depending on the style of the cap, you may need an Allen Key for this part of the job.
- Use an adjustable spanner to loosen the valve, then remove it.
- Check the Ceramic Disc Valve to see whether the leak has been caused by a build-up of dirt, or by damage to the valve. Clean or replace the valve as required.
- Secure the valve and handle cap.
How to fix a tap valve O-ring
- Remove the valve from the tap, following the instructions shown above for the kind of tap you’re working with.
- Carefully remove the worn or damaged O-ring from the valve with a screwdriver.
How to fix a spout valve O-ring
- If you have a leaky spout, you’ll need to start the repair under the sink. Use a box spanner to loosen the nut which secures the tap to the sink.
- Twist the tap around so that the small grub screw is facing you. Then remove the grub screw.
- Lift the spout so you can access the O-ring. Carefully remove the worn or damaged O-ring with a screwdriver. Carefully roll the replacement O-ring into position.
- There will be a marker on the spout. To replace the spout, line this marker up with the corresponding groove in the tap body, then slot the spout back into place. Then secure the tap in place by re-tightening the grub screw and the nut under the sink.
After carrying out any of these repairs, always test that your tap is working properly.
Tap into the experience and knowledge of ToolStore UK
Whether you’re carrying out work around the home, or a professional in need of Plumbers’ Essentials, we have everything you need. We even have specialist hand tools for more difficult work and a starter kit for an apprentice plumber available from the Plumbing section of our website.
If you’re not sure what you need, our friendly, experienced, and knowledgeable team are here to help. We have a Live Chat facility built into the website, you can send us a message, or call 03330 043777 to talk to us. Our shop, a short walk from Wigan Town Centre, is also open from Monday to Friday.
![leaking tap advice]()
Read More From ToolStore UK
How To Unblock A Sink
Read MoreHow To Wire A Light Switch
Read More- 20th December 2022


Recently Viewed


")
")

Secure online payments via ![]()